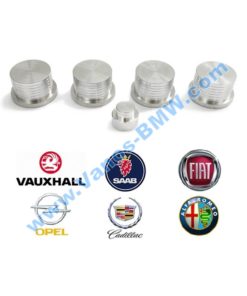
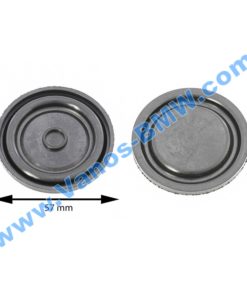
Vauxhall / Opel- Z19DTH ( 1.9 CDTI 16V 110 kW / 150 PS ) Z19DTJ ( 1.9 CDTI 16V 88 kW / 120 PS )
SAAB / Cadillac – Z19DTH ( 1.9 CDTI 16V 110 kW / 150 PS )
FIAT / Alfa Romeo – 939A200 ( 1.9 MultiJet JTDM 16V 110 kW / 150 PS )
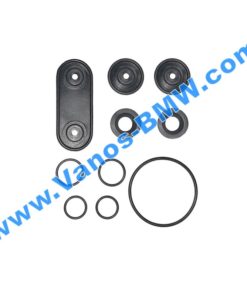
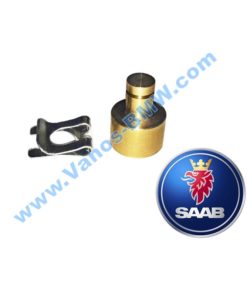
Rather than replacing the intake manifold at great cost and the problem reoccurring in the future our repair kit solves this issue, replace the unreliable bush bearings with our improved design bearings which will not fail again.
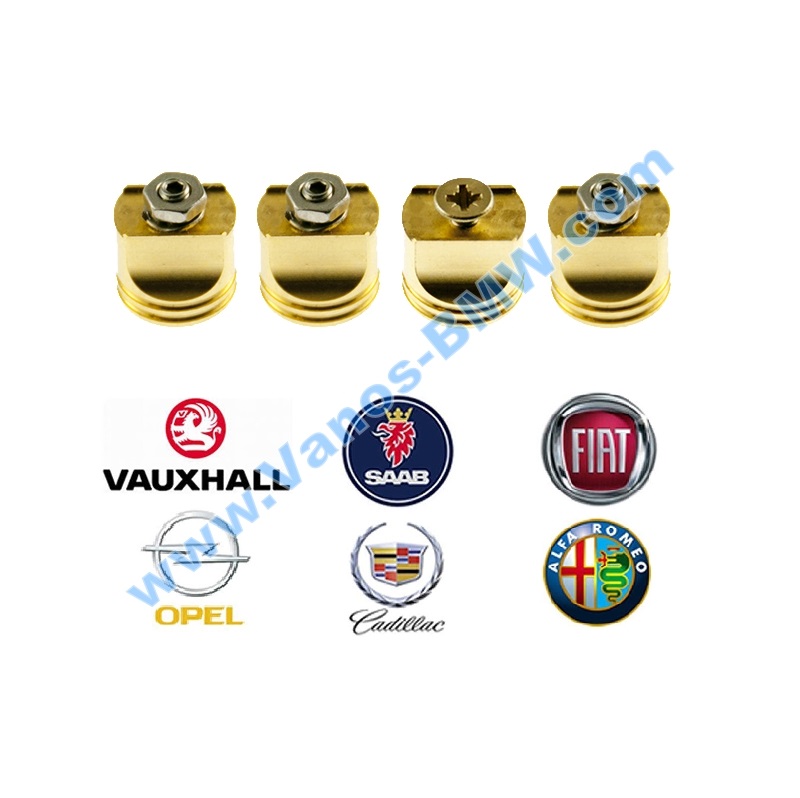
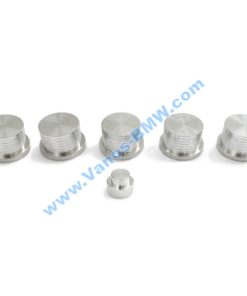
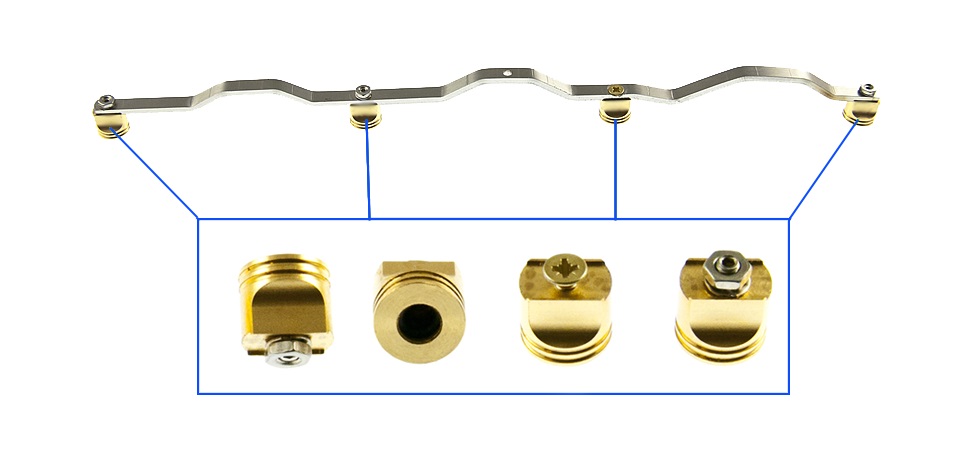
Our self lubricating bushes are made from billet Brass, fitted with a Viton O-ring and Stainless steel fasteners, designed to never fail again.
Malfunction of Swirl Flaps
First the power drops, and the fuel consumption increases. Also the vehicle tends to produce more smoke especially when accelerating. Still the car may not yet detect an error and operate without attracting much attention.
exhaust emission light malfunction indicator light Depending on the (mis-)position of the swirls, sensors in the intake manifold will at some point detect irregular pressure and report an error through the exhaust emission light or the malfunction indicator light, and the vehicle will run on an emergency programme.
When running on an emergency running programme and the power can drop significantly. Also vehicle functions such as automatic particle filter cleaning can be de-activated, which can result in severe engine damage.
A workshop or Authorized Repairer will be able to supply proper diagnostics, and most breakdown services can also check the car’s error memory for records. In most cases the vehicle software also allows to check for fault codes without external help and to check the error(s) in a fault code list (P2075.. for swirl errors).
Even if the vehicle should not yet have reported an error, it is sensible to to check for swirl damage in case increased fuel consumption, reduced power and/or increased smoke. This prevents smoke deposits in the intake manifold with risks for subsequent damage, and it can also reduce the fuel consumption.
Swirls, Actuator, Connecting Rod
Opel Vauxhall 1.9CDTI Swirl Intake Manifold Z19DTH Generally swirl failure can have three different root causes.
The first is in the swirls themselves, which can show signs of increased play and subsequently run stiff. Also for this reason the (friction) bearings have supposedly been updated with engines from 02/2007.
Secondly the actuator, which moves the swirls, can be defective. This can happen in particular if the swirls have been running stiff for too long.
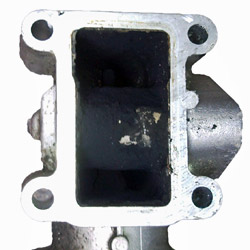
As a third root cause the operating rod that connects the swirls can be worn. The rod has four moulded plastic ball joint bushings, which are connected with ball joints on the top of the swirls. If these plastic bushings wear, the operating rod simply falls off the ball joints, so the actuator, which is located at the back of one of the swirls, only moves this one swirl instead of all four.
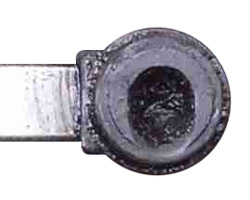
Opel Vauxhall 1.9CDTI Swirl worn operating rod The photo shows as a good example how an originally round ball joint bushing is worn. Interstingly the wear is mainly transverse to the moving direction of the operating rod, so the slightly angular position of the rod and consequent tendency to tilt forward seems to contribute much more to wear than the actual load from moving the swirls.
Diagnostics
It is not too difficult to check for swirl damage. But if doing so, always consider common safety guidelines for work on motor vehicles (let the engine cool down, disconnect battery, keep safety distance when engine is running, etc.).
Open the hood and pull off the engine cover.
If the cover’s rubber mounts stay on the engine, pull them off and re-attach them to the cover.
Look into the area below the glow plugs. There you can see the four swirl flaps from the top as well as the operating rod. The rod either sits on top of the swirls, or it lies next to them.
If the operating rod still sits on the swirls, the swirl actuator is very probably defective (continue to point 5). If the rod has come off and lies next to the swirls, maybe just the rod’s ball joint bushings are worn.
Turn the swirls’ ball joints to the same position as the third swirl from the left using a long screw driver (approx. 10 o’clock – the actuator is on the back of the third swirl, so this one cannot be moved). In doing so, check if the swirls can be turned easily, or if they are running stiff.
Oil leakage around the swirls additionally indicates play and contamination by the EGR valve. The play itself is not optimal, but normally no reason to replace the complete intake manifold system.
It is much more important to clean the EGR valve.
Put the operating rod back on the swirls’ ball joints, and then firmly press it on to the joints – both most easily from the right to the left. This takes a bit of fiddling and is easier when the glow plugs are removed (careful – do not pull the cables and remember to put the plugs back on before starting the engine).
If you now start the engine and push the accelerator, the swirls should move.
If this is the case, you can repair the operating rod with Swirl Repair. If not, the swirl actuator is broken, and unfortunately an exchange of the complete intake manifold system is indispensable.
The Standard Repair
The actuator, which moves the swirls, is available separately. But it is very difficult to access, because it is located underneath the intake manifold. To replace it the complete intake manifold needs to be removed, so the labour cost alone is usually a few hundred Euros.
The swirls and the swirl bush bearings, as well as the swirl operating rod, are not available separately. Both are only available with the complete intake manifold assembly.
Therefore in any case – independent from the type of swirl damage – the complete intake manifold, preferably including the actuator, is replaced. Even in the best cases the costs for this are easily in excess of € 500. Dealerships in Germany have often charged more than € 900.
The Alternative – Swirl Repair
If the system has taken too hard damage, or if a defective swirl actuator requires the intake manifold to be removed anyway, there is no alternative to the standard repair.
But if only the swirl operating rod is damaged, it can be easily and permanently repaired with Swirl Repair at a fraction of the standard repair cost and without expensive removal of the intake manifold.
Also even if replacement of the intake manifold assembly should be planned in the long term, Swirl Repair can helps as a temporary solution, which gives you time to find an affordable garage and/or cheap parts.
What is Swirl Repair?
Swirl Repair is a repair kit for the swirl operating rod of the following engines:
Opel Vauxhall Saab Cadillac Z19DTH (1.9 CDTI 16V, 110kW/150hp)
Opel Vauxhall Z19DTJ (1.9 CDTI 16V, 88kW/120hp)
Fiat Alfa Romeo 939A2000 (1.9 Multijet 16V, 110kW/150hp)
Fiat Alfa Romeo 939A3000 (2.4 Multijet 20V, 147kW/200hp)
Rather than replacing the intake manifold assembly including swirl flaps when just the operating rod is damaged, Swirlrepair is a replacement for the worn plastic ball joint bushings of the operating rod.
What are the advantages of Swirl Repair?
Swirl Repair is much cheaper than an exchange of the complete intake manifold assembly.
Also if the swirl operating rod has come adrift and your vehicle should not yet have recognized the defect, a repair with SwirlRepair will still pay off quickly. Smoke is reduced for the benefit of the engine and the environment, and also the performance increases while the fuel consumption drops back to its usual, low level, so the expense on Swirl Repair can be returned after just a few weeks.
Even if you should consider replacing the intake manifold assembly due to worn swirl flaps, Swirl Repair helps as a temporary fix. It gives you time to find an affordable garage and/or cheap parts while you can still use your car. Read what our customers think of SwirlRepair.
How does Swirl Repair work?
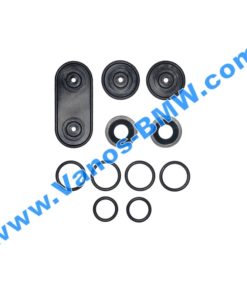
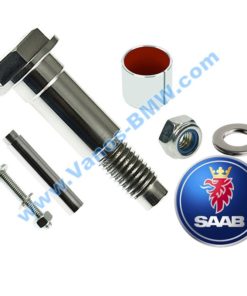
SwirlRepair illustration SwirlRepair consists of bushings made from high quality brass and stainless steel. You remove the worn plastic ball joint bushings from the operating rod and attach the SwirlRepair bushings with a 5.5mm key. In Addition it is sometimes necessary to drill a countersink in one of the existing holes of the operating rod and use an extra bushing with a countersunk bolt, which is supplied with the Swirl Repair kit. For the 20V five cylinder engine you simply use all five bushings that are supplied. After this you just need to re-attach the operating rod to the ball joints of the swirl flaps.
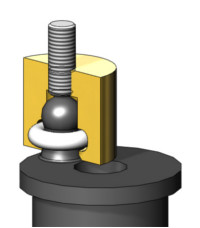
The picture shows a cross-sectional view of one of the brass bushings. Inside the bushing you can see an o-ring, which is located in a groove. The o-ring is made from temperature resistant material and works as a snap feature, thus keeping the bushing in place on the swirl flap’s ball joint. At the top the bushing a threaded stainless steel pin is installed, which is used to attach the bushing to the operating rod with a stainless steel nut and spring washer.
How is Swirl Repair installed?
Mounting Swirl Repair is easy. It just requires a bit of patience to attach the repaired operating rod as the swirl flaps are not so easy to access, but this would be the same if you would try to re-install the operating rod without fitting Swirl Repair.
If you prefer, you can also have Swirl Repair installed by a specialist, who should not need more than 15-20 minutes for the complete job even without any routine.
Furthermore we now also offer a complete and assembled rod, so you can simply exchange the damaged rod with a new one.
Our Recommendations
The root cause for wear of the swirl flaps in not just normal load from movement and pressures in the intake manifold.
Contamination`s of the intake manifold also contribute to wear of the swirls. Such contamination`s are particularly caused by the Exhaust Gas Return (EGR) valve. Therefore breakdowns of the EGR valve are quite common on the Z19DTH engine.
Therefore it is recommended to clean the EGR valve and also the boost pressure sensor (black sensor attached to the manifold with a Torx bolt) on a regular basis. Here you find a detailed description that shows how to clean the EGR. The description also shows how to repair an EGR with a stuck solenoid, so if your EGR should fail rather give it a try before you buy a new one.

Some of the vehicles affected and associated part numbers:
Alfa Romeo – 939A200 ( 1.9 MultiJet JTDM 16V 110 kW / 150 PS)
147 – 1.9 JTDM 8v 2005+ [HP 120]
147 – 1.9 JTDM 16v 2005+ [HP 150]
147 – 1.9 JTD 16v 2004+ [HP 136]
156 – 1.9 JTD 2003-2005 [HP 126]
156 – 1.9 JTD 2004-2005 [HP 150]
156 Sportwagon – 1.9 JTD 16v Q4 2004-2006 [HP 150]
156 Sportwagon – 1.9 JTD 2005-2006 [HP 150]
156 Sportwagon – 1.9 JTD 2003-2006 [HP 126]
159 Saloon – 1.9 JTDM 8v 2005+ [HP 120]
159 Saloon – 1.9 JTDM 8v 2005+ [HP 115]
159 Saloon – 1.9 JTDM 16v 2005+ [HP 136]
159 Sportwagon – 1.9 JTDM 8v 2006+ [HP 120]
159 Sportwagon – 1.9 JTDM 8v 2006+ [HP 115]
GT – 1.9 JTD 2003+ [HP 150]
Fiat – Enigines M91 & M92
Croma – 1.9 D Multijet 2005+ [HP 150]
Stilo – 1.9 D Multijet 2005+ [HP 150]
Stilo Multi Wagon – 1.9 D Multijet 2005+ [HP 150]
Vauxhall – Engines Z19DTH & Z19DTJ
Astra Mk V (H) – 1.9 CDTi 2004-2009 [HP 150]
Astra Mk V (H) – 1.9 CDTi 2004-2009 [HP 120]
Astra Mk V (H) Estate – 1.9 CDTi 2004-2009 [HP 150]
Astra Mk V (H) Sports Hatch – 1.9 CDTi 2004-2010 [HP 150]
Astra TwinTop Mk V (H) – 1.9 CDTi 2006+ [HP 150]
Astravan (H) – 1.9 CDTi 2005+ [HP 150]
Signum – 1.9 CDTi 16v 2004-2008 [HP 150]
Vectra MK II (C) – 1.9 CDTi 16v 2004-2005 [HP 150]
Vectra MK II (C) GTS – 1.9 CDTi 16v 2004-2005 [HP 150]
Vectra MK II (C) Estate – 1.9 CDTi 16v 2004-2005 [HP 150]
Zafira MK II (B) – 1.9 CDTi 2005-2011 [HP 150]
Saab – Engines Z19DTH & Z19DTJ
9-3 Saloon – 1.9 TiD 2004+ [HP 150]
9-3 Convertible – 1.9 TiD 2006+ [HP 150]
9-5 Saloon – 1.9 TiD 2006+ [HP 150]
9-5 Estate – 1.9 TiD 2006+ [HP 150]
2.03462.03, 55210201, Pietburg inlet manifold, 93179055, 55206459, 55182684 GM, Z19DTH.
| Weight | 0.1 kg |
|---|---|
| Dimensions | 10 × 10 × 3 cm |
